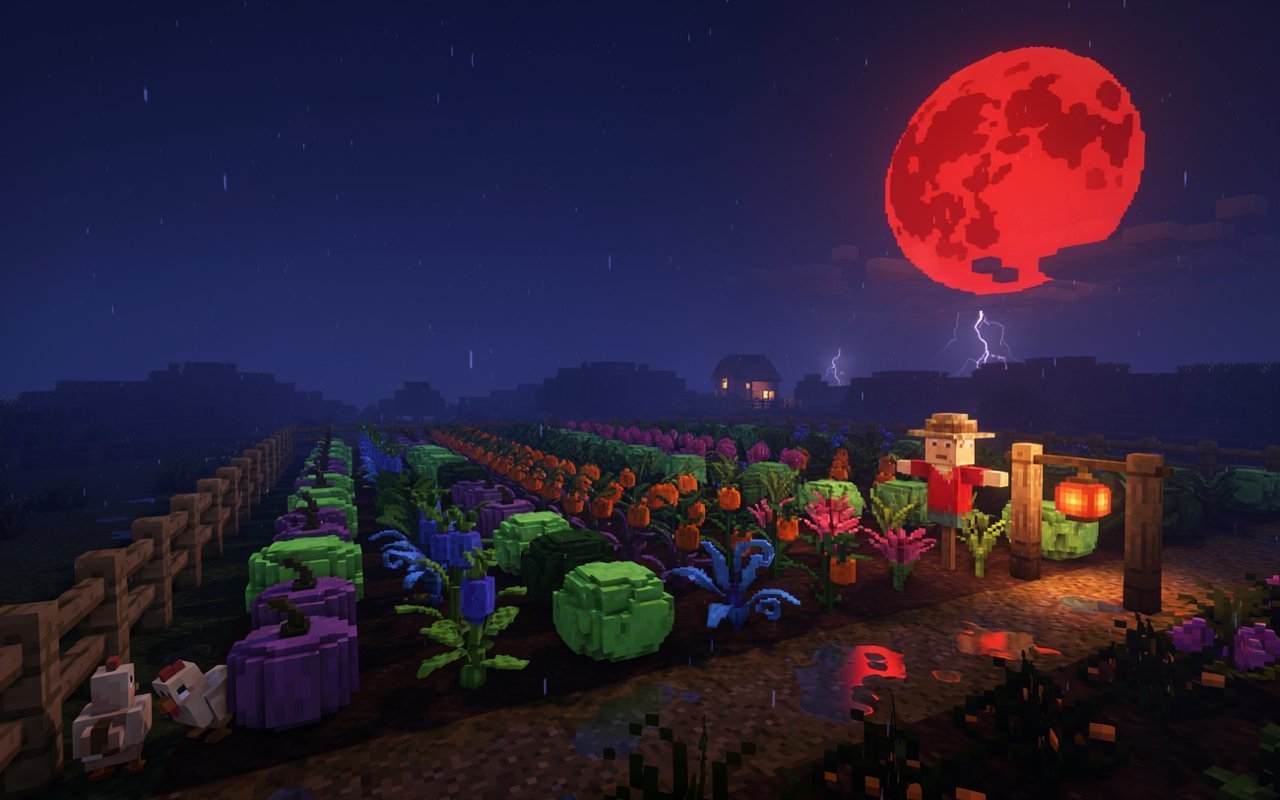
Grow a Garden Weather Tracker: Live Events, Mutation Timing & Farming Strategy (2026)
Complete guide to weather tracking in Grow a Garden — every weather event explained, how they affect mutations and crop growth, Blood Moon farming strategy, and how to maximize every rare event window.
Most Grow a Garden players treat weather as background noise — something that just happens while they farm. Experienced players treat weather as a core farming mechanic. They track Blood Moon windows, time their harvests around Thunderstorms, and respond to rare events within seconds of them appearing.
The difference in Sheckle output between a player who tracks weather and one who doesn't can be 3–5× per session. This guide explains every weather event, how each one affects your crops and mutation chances, and exactly what to do when each event appears.
What Is Grow a Garden Weather Tracking?
Weather tracking means monitoring the current and upcoming in-game weather conditions to optimize your farming decisions in real time.
Unlike traditional farming games where weather is cosmetic, Grow a Garden weather directly affects:
- Mutation rates — some events dramatically increase the chance of Gold, Rainbow, and rarer mutations
- Crop growth speed — certain events accelerate or slow your growth timers
- Crop yields — specific weather conditions increase harvest amounts
- Weather mutations — crops growing during certain events can pick up weather-specific mutation bonuses
A dedicated weather tracker tells you the current condition, how long it will last, and what's coming next. This lets you plant the right crops at the right time instead of farming blind.
Complete Grow a Garden Weather Events Guide
☀️ Sunny
Rarity: Very Common
Duration: 5–15 minutes
Mutation Effect: None — baseline rates only
Growth Effect: Standard growth speed (1×)
Sunny is the neutral state. No special effects in either direction. The only notable thing about Sunny is that it tells you no special event is active — which is your signal to either wait for the next event or farm normally.
Strategy during Sunny: Good time to harvest crops that are ready, re-plant, and prepare for the next event. Don't burn high-value rare seeds during Sunny if a Blood Moon or Thunderstorm is approaching.
☁️ Cloudy
Rarity: Common
Duration: 5–10 minutes
Mutation Effect: None
Growth Effect: Slight reduction (0.95×)
Cloudy is slightly worse than Sunny for growth speed, with no offsetting benefits. Most players don't adjust strategy during Cloudy.
Strategy during Cloudy: Same as Sunny — routine farming. Don't plant anything time-sensitive if a better event might start shortly.
🌧️ Rain
Rarity: Uncommon
Duration: 5–10 minutes
Mutation Effect: Slight increase to common mutations (Wet mutation more likely)
Growth Effect: Auto-watering — crops don't need manual watering while rain is active
Rain's main practical benefit is auto-watering. If your watering routine takes significant time in your session, rain gives you that time back. The Wet growth mutation (2×) also becomes more likely during rain.
Strategy during Rain:
- Stop manual watering — let rain handle it
- Focus on planting and harvesting instead
- Wet mutation becomes slightly more accessible — if you're farming crops that benefit from Wet stacking, rain windows are mild farming opportunities
Wet Mutation during Rain:
Wet (2×) normally appears on crops that are regularly watered. During rain, the Wet mutation trigger rate is elevated slightly. While 2× isn't a large multiplier standalone, Wet stacks with everything else. A Gold + Amber + Wet crop has combined multiplier: 20 × 30 × 2 = 1,200×.
⚡ Thunderstorm
Rarity: Uncommon
Duration: 3–8 minutes
Mutation Effect: Stormy mutation chance for growing crops (+2.5× multiplier)
Growth Effect: +20–30% growth speed acceleration
Thunderstorm is a moderately valuable event that players underestimate. The growth speed boost is genuinely meaningful for fast-cycle farmers, and the Stormy mutation (2.5×) is free stacking value on any crop growing during the storm.
The Stormy mutation mechanics:
Crops must be actively growing (not yet ready to harvest) when Thunderstorm starts to have a chance at picking up the Stormy mutation. If you harvest right before a Thunderstorm starts, you miss the mutation window for those crops. If you keep crops in the ground during the storm, they're rolling for Stormy.
Stormy + Gold + Amber stack: 2.5 × 20 × 30 = 1,500× combined multiplier. That's from a Thunderstorm you didn't have to do anything for except keep your crops in the ground.
Strategy during Thunderstorm:
- If crops are 60–70% complete, let them stay in the ground during the storm — they're rolling for Stormy
- After the storm, harvest and replant — now benefit from the growth speed boost
- Pair Thunderstorm farming with Raptor for Amber stacking on Stormy crops
🥶 Frost
Rarity: Rare
Duration: 3–5 minutes
Mutation Effect: Chilled mutation for growing crops (1.2×)
Growth Effect: -30% growth speed (significant slowdown)
Frost is generally unfavorable. The 30% growth slowdown is real and costly, and the Chilled mutation (1.2×) is the weakest weather mutation in the game.
Frost-resistant crops: Some crops are immune to Frost's growth penalty. Knowing which crops in your inventory are frost-resistant lets you keep farming efficiently during Frost events.
Strategy during Frost:
- If you have frost-resistant crops, plant them during Frost to avoid the growth penalty
- If you don't, avoid planting slow-growing crops — the 30% penalty adds significant time to already-long growth cycles
- Chilled mutation (1.2×) stacks with everything, so it's not entirely wasted — but don't plan around it
🔥 Heatwave
Rarity: Rare
Duration: 3–8 minutes
Mutation Effect: Burnt mutation for growing crops (1.2×)
Growth Effect: +40% growth speed for specific heatwave-compatible crops
Heatwave has a split effect: the growth boost is strong for the right crops, and the Burnt mutation (1.2×) is weak standalone but stacks freely.
Which crops benefit from Heatwave: Specific high-temperature crops (desert variants, fire-type crops) receive the 40% growth bonus. Standard crops see no growth effect. Knowing which crops in your inventory are heatwave-compatible is essential for maximizing this event.
Strategy during Heatwave:
- Plant your heatwave-compatible high-value crops when this event starts
- Burnt mutation (1.2×) on a Gold + Amber crop: 1.2 × 20 × 30 = 720× combined. Small multiplier, meaningful result.
- If you have fast-growing heatwave crops ready, Heatwave windows are high-efficiency farming moments
🌕 Blood Moon
Rarity: Very Rare
Duration: 2–5 minutes
Mutation Effect: ALL mutation rates dramatically elevated — estimated 3–5× normal rates
Growth Effect: Bloodsoaked mutation becomes available (35×, Blood Moon exclusive)
Blood Moon is the single most important event in Grow a Garden. Everything changes when the Blood Moon appears. Players who react to Blood Moon within the first 30 seconds extract significantly more value than those who notice mid-event or miss it entirely.
This event deserves its own detailed section — see Blood Moon Farming Strategy below.
🌑 Eclipse
Rarity: Very Rare
Duration: 2–4 minutes
Mutation Effect: Special crop variants become available
Growth Effect: Unknown — community data still being gathered
Eclipse is the rarest standard weather event. It enables specific crop variants that don't appear under any other conditions. Community research on Eclipse mechanics is ongoing — the event appears infrequently enough that data is still being compiled.
Strategy during Eclipse:
- Harvest any crops in your priority queue immediately
- Replant with the crops known to produce Eclipse-specific variants
- Don't miss the window — Eclipse events are extremely rare
Blood Moon Farming Strategy
Blood Moon is the biggest Sheckle opportunity in the game on a per-minute basis. Here's the exact strategy to maximize it.
Why Blood Moon Matters So Much
Normal mutation rates for Gold: approximately 1–2% per harvest.
Blood Moon mutation rates for Gold: approximately 3–8% per harvest (estimated based on community data).
That's 3–5× your normal mutation rate for the duration of the event. Combined with Bloodsoaked (35×) becoming available, and all other mutation types also elevated, Blood Moon is the highest-density mutation farming window you'll ever have.
Players who correctly respond to Blood Moon and already have crops planted when it starts will get several high-value mutations in a single event. Players who notice Blood Moon 3 minutes in, scramble to plant, and get no harvests in before it ends get nothing.
The difference is preparation.
Pre-Blood Moon Preparation Checklist
You can't predict exactly when Blood Moon appears, but you can prepare so you're always ready:
Always-on habits:
- Keep all plots planted at all times — never leave empty plots
- Equip Raptor in pet slot 1 permanently for sessions
- Keep your highest-value seeds in inventory, ready to plant
When Blood Moon is imminent (community tracker alert):
- Pause whatever you're doing
- Check which crops are closest to harvest — ready to pull immediately
- Have a watering can ready
When Blood Moon Starts: Exact Response
Seconds 0–30:
- Harvest any crop that is 70% complete or more — don't wait for 100%
- Missing a Blood Moon harvest window is worse than harvesting at 70%
Seconds 30–90:
- Re-plant immediately with your fastest-growing, highest-value seeds
- The goal is to get crops into the ground fast so they can harvest within the Blood Moon window
Throughout the event:
- Harvest every completed crop the second it's done
- Re-plant every harvested plot immediately
- Keep the cycle running — harvest, plant, harvest, plant
Final 60 seconds:
- Plant fast-growing crops that might complete before the event ends
- If crops won't complete during Blood Moon, they still benefit from the Bloodsoaked mutation if they're growing when it ends (community-disputed, verify in-game)
Blood Moon + Raptor: The Optimal Combination
Raptor's Amber proc (2.5–2.8% per harvest) during Blood Moon is extraordinary. During normal farming, you might get 1–2 Amber mutations per session of 50 harvests. During a Blood Moon 5-minute session with rapid harvesting, you might get 3–5 Amber procs in that window alone.
Each Amber proc on a crop that also picks up a Blood Moon mutation roll is potentially:
- Gold (20×) + Amber (30×) = 600× combined
- Rainbow (50×) + Amber (30×) = 1,500× combined
- Bloodsoaked (35×) + Amber (30×) = 1,050× combined
This is why serious mutation farmers call Blood Moon + Raptor the highest-value farming combination in the game.
Blood Moon Timing
Blood Moon doesn't follow a perfectly fixed schedule, but community data suggests it appears roughly once per 45–90 minutes of active game time under normal conditions. Event buffs or special circumstances may alter frequency.
The most reliable way to never miss Blood Moon:
- Join a community Discord with live Blood Moon alerts
- Stay active on the server — other players will announce it
- Use a dedicated community tracker site or tool
How Weather Affects Mutation Stacking
Weather mutations don't replace other mutations — they stack with them. This is critical to understand.
When a crop picks up a Stormy mutation (2.5×) during a Thunderstorm AND gets Gold (20×) naturally AND Amber from Raptor (30×), all three stack:
2.5 × 20 × 30 = **1,500× combined multiplier**
This isn't an additive bonus. Weather mutations multiply the already-multiplied value from every other mutation on that crop.
Full weather mutation interaction table:
| Weather Mutation | Multiplier | Stacks With |
|---|---|---|
| Wet (Rain) | 2× | Standard, Pet, Event, other Growth |
| Stormy (Thunderstorm) | 2.5× | Standard, Pet, Event, Growth |
| Burnt (Heatwave) | 1.2× | Standard, Pet, Event, Growth |
| Chilled (Frost) | 1.2× | Standard, Pet, Event, Growth |
| Bloodsoaked (Blood Moon) | 35× | Standard, Pet, Growth |
Every weather mutation stacks with every other mutation type. There are no weather-standard conflicts or weather-pet conflicts. Free additional multiplier — all you have to do is have crops in the ground.
Weather Farming Calendar: What to Plant When
Different weather events favor different crop types and farming strategies. Here's a quick decision guide:
| Weather Event | Best Action |
|---|---|
| Sunny / Cloudy | Routine farming, harvest and replant, prepare for next event |
| Rain | Auto-water crops, plant anything, harvest freely |
| Thunderstorm | Keep growing crops in ground for Stormy mutation, plant fast-growers |
| Frost | Plant frost-resistant crops only, avoid slow-growers |
| Heatwave | Plant heatwave-compatible high-value crops immediately |
| Blood Moon | Maximum output mode — harvest everything 70%+, replant, repeat |
| Eclipse | Harvest and replant for Eclipse-specific crop variants |
Community Weather Tracking Tools
Real-time weather tracking requires either being actively in-game or using community resources. Options:
In-game tracking: Watch the sky and environment visuals. Blood Moon has distinctive visual cues (reddish sky, ambient changes). This is free but requires active attention.
Community Discord alerts: Most Grow a Garden community Discord servers have dedicated channels where members announce Blood Moon and other rare events in real time. Response time matters — getting a notification and being in-game within 60 seconds is significantly more valuable than getting a notification 3 minutes late.
Third-party trackers: Web-based trackers that display current in-game weather for active servers. Quality varies — some update in real time, others have lag.
Our Weather Tracker page — we're building a live weather tracker integrated with our calculators. In the meantime, use community Discord for the fastest alerts.
Weather Strategy for Different Farming Styles
Mutation Farmer
Priority weather: Blood Moon above everything else. Thunderstorm is the secondary priority (Stormy stacks well with Amber).
Setup: Raptor equipped at all times. Community alerts active. Seeds for rapid replanting in inventory. During Blood Moon, enter maximum-output mode as described above.
Crop Volume Farmer
Priority weather: Thunderstorm (growth speed) and Heatwave (if heatwave-compatible crops).
Setup: Fast-growing crops always in ground. Frost-resistant crop inventory for Frost events. Thunderstorm watch for replant timing.
Passive Farmer (Long Offline Sessions)
Priority weather: Rain (auto-watering). Less urgent about Blood Moon because long-cycle crops won't harvest during the short window.
Setup: Plant slow-growing high-value crops, equip Golden Goose and Stegosaurus, check in during Blood Moon for any completions.
Frequently Asked Questions
Q: How long does Blood Moon last on average?
A: Community data suggests 2–5 minutes per Blood Moon event. The duration appears to vary randomly within that range.
Q: Does weather affect crops that are already harvested (in inventory)?
A: No. Weather only affects crops that are actively growing in your plots. Once harvested, a crop's mutations are set.
Q: Can a crop pick up both a weather mutation AND a pet mutation?
A: Yes. Weather mutations and pet mutations are separate systems. A crop can simultaneously pick up Stormy (from Thunderstorm) during growth AND Amber (from Raptor) at harvest time.
Q: If my plot is empty when Blood Moon starts, did I miss it entirely?
A: Not entirely — you can still plant during Blood Moon and benefit from the elevated mutation rates at harvest. But crops planted right when Blood Moon starts may not complete before it ends. This is why having crops already in the ground when Blood Moon begins is so valuable.
Q: Does Blood Moon increase the chance of ALL mutations or just standard ones?
A: All mutation categories see elevated rates during Blood Moon — standard, weather, and the Bloodsoaked mutation (which only appears during Blood Moon). Pet-applied mutations like Raptor's Amber proc may also see indirect boosts through general mutation rate increases.
Q: Is there a way to predict when Blood Moon will appear?
A: Not precisely. Community data shows a rough pattern (approximately once per 45–90 minutes) but it's not perfectly clockwork. Community Discord alerts and active trackers are the most reliable notification method.
Q: Should I hold off planting rare seeds until Blood Moon?
A: For high-rarity or expensive seeds, yes — if Blood Moon is expected soon and the seed's growth cycle is short enough to complete during Blood Moon, the wait can be worth it. For seeds with growth cycles longer than Blood Moon's duration, it doesn't matter when you plant them.
Q: What's the most common beginner mistake around Blood Moon?
A: Having empty plots when it starts. The second most common: harvesting right before Blood Moon starts and then having nothing growing during the elevated-rate window.
How Weather Interacts With Events
Weather events and special in-game events are separate systems. During the Prehistoric Event, Prehistoric mutations are available AND Blood Moon can still occur simultaneously. If you're farming during a special event and Blood Moon appears, both the event-specific mutations AND Blood Moon's elevated rates are active at the same time.
This layering creates the highest-density mutation farming opportunities in the game. Prehistoric Event + Blood Moon = Prehistoric mutations AND elevated standard mutation rates AND Bloodsoaked available.
If you know a special event is active, treat every Blood Moon during that event as a priority-one farming window.
Tools for Weather-Informed Farming
| Calculator | How It Helps with Weather |
|---|---|
| Crop Value Calculator | Calculate value of weather-mutated crops instantly |
| Mutation Stacking Calculator | See how Stormy / Bloodsoaked stacks with your other mutations |
| Harvest Optimizer | Time harvests around weather event windows |
| Trade Checker | Verify value of weather-mutated crops before trading |
Quick Summary
Weather events are not background flavor — they're active farming variables that affect mutation rates, growth speeds, and yield amounts. Blood Moon is the single most important event in the game: respond immediately, have crops planted, run maximum harvest cycles for the duration.
The players who make the most Sheckles are not the ones with the rarest seeds. They're the ones who are farming during Blood Moon with Raptor equipped and crops ready to harvest.
→ Mutation Stacking Calculator — see how weather mutations stack with your setup
→ Crop Value Calculator — calculate weather-mutated crop values
→ Harvest Optimizer — plan harvests around weather windows
Abdullah
Grow a Garden player & calculator builder · Updated Jul 30, 2026